
Five years ago, we had gathered for dinner at my parents’ house when my sister Shelby asked us to join her in the living room for a photo. Shelby, our family’s official photographer, often made such requests, so it wasn’t unusual. We all sat there, smiles on our faces, waiting for the timer to go off. However, when the 3-2-1 countdown finished, instead of shouting “cheese,” she exclaimed, “We’re having a baby!”
Initially, we were all incredibly confused, uncertain about what was happening. Then we saw the radiant smiles on my sister’s and her husband’s faces, and everything became clear. I shouted so much that night that I could barely speak the next day.
This month, my nephew, Levi, will turn 5. After being a family of adults for so long, we were overjoyed to learn that a baby would soon be part of our lives. My parents would become grandparents, my husband and I would become uncles, and our entire family dynamic would undergo a profound transformation.
As it turned out, Levi was the catalyst for a series of wonderful events. Since then, Shelby has had a daughter, and my other sister, Kelsey, has become a mother to two beautiful girls. My brother, Stephen, is expecting his first child next month.
For a family that once had no young children, we’re now blessed to have four, soon to be five. Although they all live down south, we make every effort to stay connected through the wonders of technology and FaceTime.
I am incredibly excited about Brightline launching its service from Orlando to Miami later this month. With trains running hourly and a travel time of only three hours, weekend visits and even same-day trips will become much more feasible.
Truth be told, I’ve never quite understood why it took so long for high-speed train travel to become a reality in the United States. I’ve often dreamed of taking an overnight train to New York or up north to catch a show, witness the changing of the leaves, and so much more. I don’t believe I’m alone in this sentiment, but perhaps that’s a topic for another column.
Being the oldest of four siblings, it has been an incredible journey to watch my little sisters become parents. To be honest, I shed tears of joy when I first met each of their children. There is quite an age gap between us — I am 10 years older than my first sister, 14 years older than my other sister, and 16 years older than my brother.
Why the age difference, you may ask? I was born three months premature, weighing only 2.5 pounds. I spent more than six weeks in an incubator before my parents could take me home (the week of Christmas). It was the mid-1970s, and my parents were only 19 years old at the time. It took them a while to overcome the fear of it happening again. And yes, in case you were wondering, my other siblings were born prematurely as well, though only by a few weeks.
Witnessing your siblings become parents is a unique experience. Sometimes, I look at my niece, Mila, and it feels as if I’m looking at my sister Kelsey when she was a little girl. The resemblance is uncanny.
The passage of time is the most remarkable marker of age — the age we actually are, the age we feel, and the age of those around us. While I may not be a fan of the ever-turning pages of the calendar for myself, I eagerly anticipate watching my nieces and nephew grow and discover the people they will become. And with that in mind, this month’s recipes are ones that are meant to be enjoyed with family, friends that are family, or all of the above.
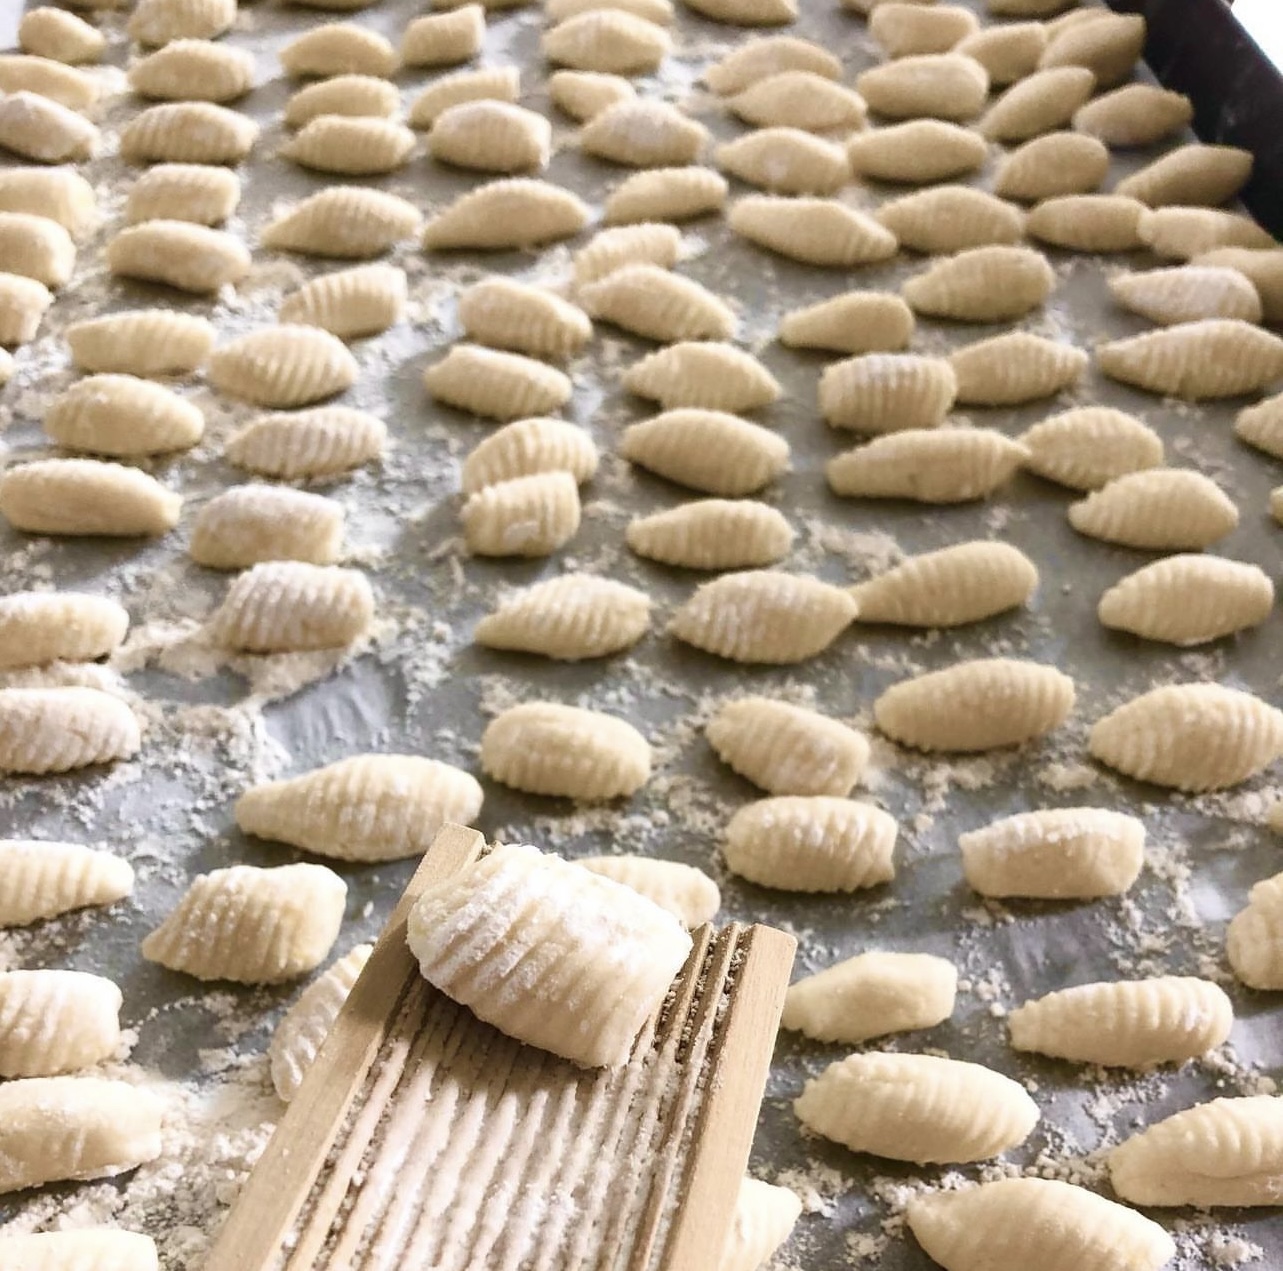
First up is a recipe for gnocchi using leftover mashed potatoes. We make this almost once a week, as it’s a great way to have a whole other meal from leftovers.
Gnocchi
Ingredients:
• 2 cups leftover mashed potatoes
• 1 cup all-purpose flour (more or less), plus extra for dusting
• Your favorite pasta sauce
Directions: Start with cold leftover mashed potatoes. If your mashed potatoes have any additional ingredients like salt, butter or cream, that’s fine. In a large mixing bowl, combine the leftover mashed potatoes and gradually add the all-purpose flour to the potato mixture, a bit at a time, and gently knead the mixture until it forms a dough. Be careful not to overwork the dough; you want it to come together without becoming too tough.
The amount of flour you need may vary depending on the moisture content of your mashed potatoes, so add it slowly until the dough is no longer sticky.
On a lightly floured surface, divide the dough into several portions. Roll each portion into a long, thin rope, about 1/2 inch in diameter. With a sharp knife, cut the rope into bite-size pieces, about 1 inch long. You can use a gnocchi tool or a fork to create ridges on the gnocchi, which helps them hold sauce better. To do this, simply press each piece of gnocchi gently against the tines of the fork and roll it down.
To cook the gnocchi: Bring a large pot of salted water to a boil. Drop the gnocchi into the boiling water in batches. They will sink to the bottom at first and then float to the surface. Once they float, let them cook for an additional 1-2 minutes or until they are cooked through.
Use a slotted spoon to remove the cooked gnocchi from the water, and transfer them to a plate or into your favorite sauce that you have standing by. You can also sauté them in butter or olive oil for a few minutes until they develop a light golden color for added flavor.
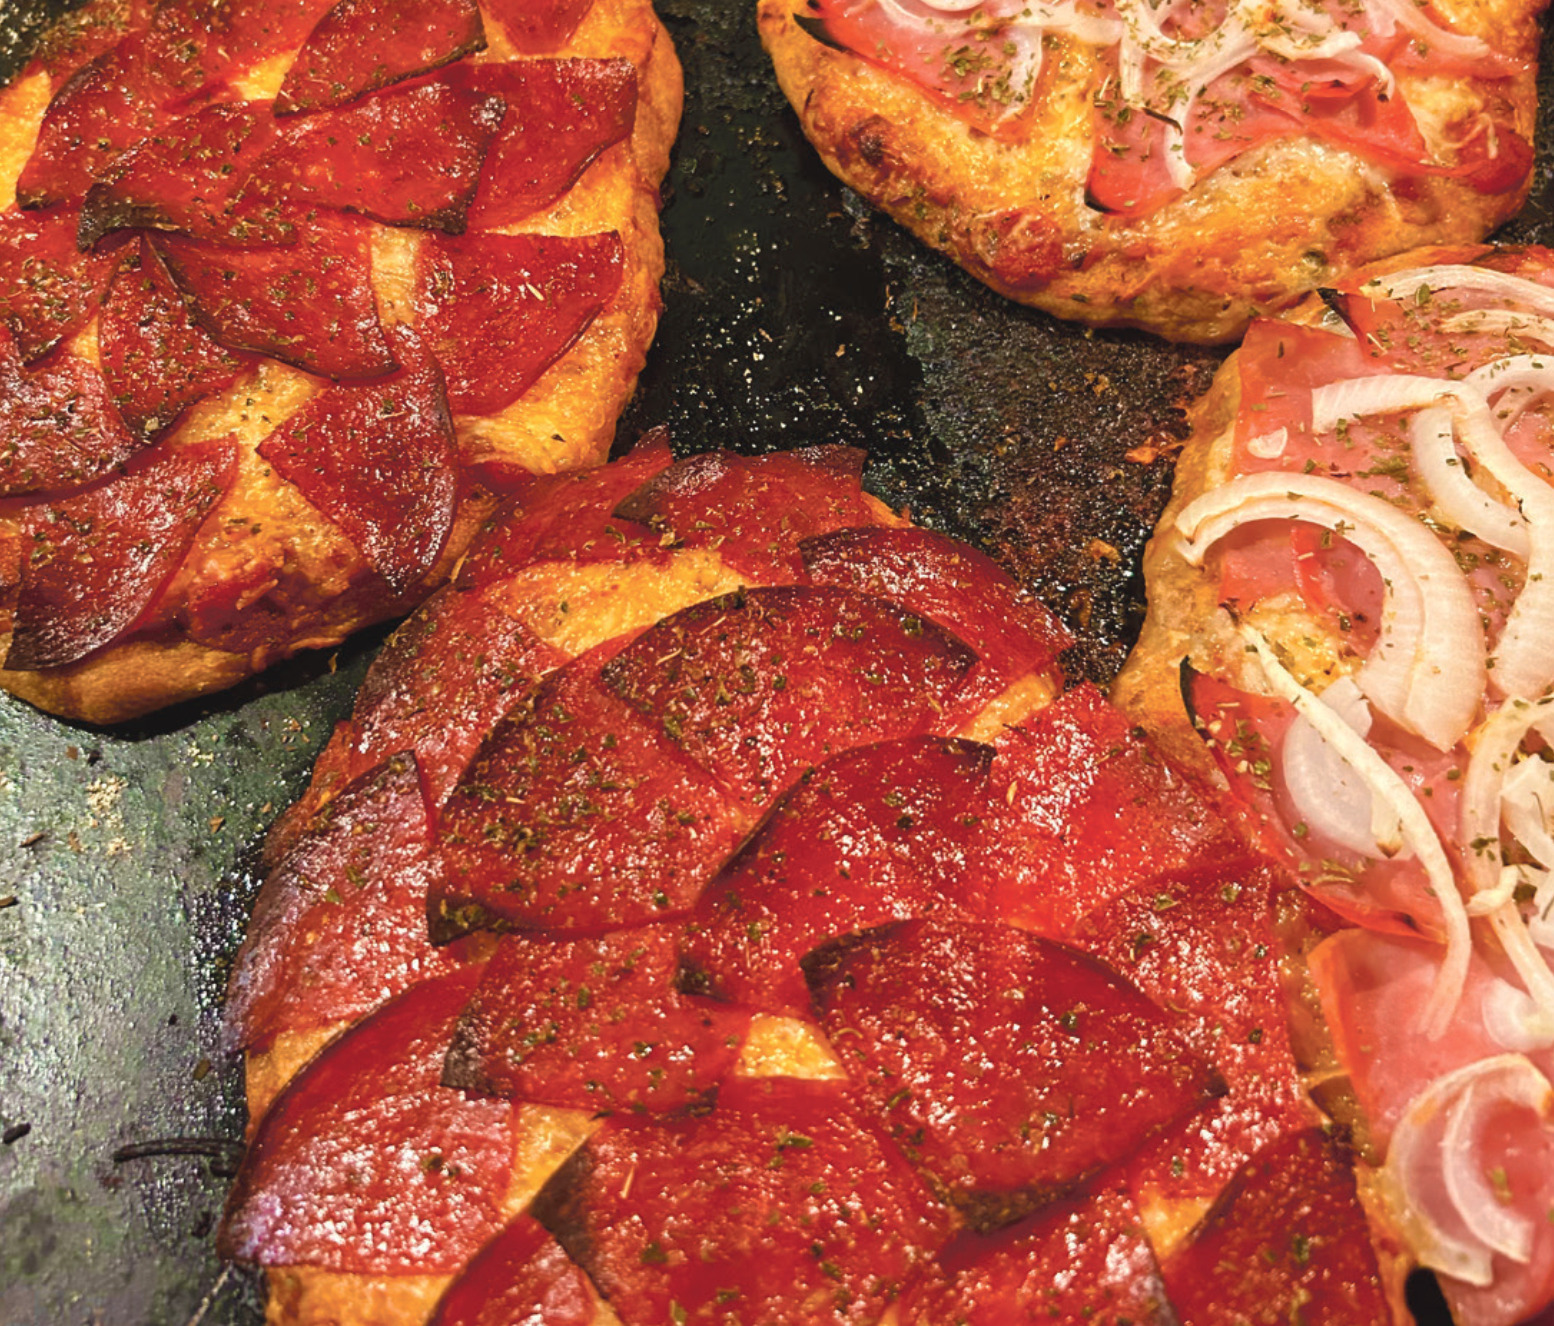
Whole-wheat pizzettes
Ingredients:
• 1 tsp. of sugar
• 2 1/4 tsp. active dry yeast
• 1 cup of warm water
• 2 to 2 1/2 cups of wholewheat flour
• 1 tsp. of salt
• 3 tbsp. of olive oil
• Sauce
• Cheese
• Toppings
• Cornmeal for dusting
• Dried oregano
Directions: In the bowl of a stand mixer, place the sugar, and mix it with the warm water. Add the yeast and stir to combine. Let the yeast proof until it becomes foamy, which usually takes about 8 minutes. With a dough hook on your mixer and the mixer running at low speed, add 1 cup of the flour. Add the salt and oil, and carefully begin adding the remaining flour little by little until a ball forms. You may need as little as two cups or as much as two-and-a-half. The goal is for the dough to form a ball, but be cautious not to add too much flour, as it could make the dough tough.
Continue to knead the dough on medium speed for 7-8 minutes. Remove the dough, and spray the bowl with cooking spray. Place the dough back in the bowl, cover it with a clean dish towel, and allow it to rise in a very warm place for about 45 minutes. I place it on a table on the back porch.
Preheat your oven to 500 degrees, and sprinkle a large baking sheet with a bit of cornmeal. Tape some parchment paper to your counter using painter’s tape (this will make cleanup much easier). Place about 1/4 cup of regular, white all-purpose flour on the paper, and divide the dough into six equal pieces. Using your hands only, without a rolling pin, stretch each piece into a small roundish shape until you have all six pieces on your baking sheet.
Brush each piece with olive oil, and then spread about two tablespoons of sauce on each round. Top with mozzarella cheese and your favorite toppings. Sprinkle each of the pizzas liberally with dried oregano.
Bake for 17-20 minutes or until the cheese and toppings appear ready. These pizzas freeze beautifully and can be reheated in a 400-degree oven for about 20 minutes.
Lastly, with the holidays fast approaching, is a recipe for homemade chocolates using a regular square ice-cube tray. These are great fun to make with kids and make a wonderful gift, too
Ice-cube Tray Chocolates
Ingredients:
• 8 ounces of semisweet, bittersweet, white or milk chocolate, chopped (I find Hershey bars work great)
• Your favorite fillings, such as peanut butter, raspberry jam, dulce de leche, chocolate-hazelnut spread, halved or quartered caramels, candied coconut and cookie pieces, etc.
• Candy pieces, sprinkles, nuts, or colored chocolate for décor
Directions: Place half of the chocolate in a small bowl. Microwave for 45 to 60 seconds, stirring every 15 seconds. If needed, continue to microwave in 5-to 10-second intervals until melted. Stir in the remaining chocolate. Stir continually for 2 minutes or until completely smooth, with no pieces of solid chocolate remaining. If a few small pieces of chocolate remain, continue to microwave in 5-second intervals, stirring after each until smooth.
If desired, add some sprinkles, candy, or cookie pieces to each compartment in the ice-cube tray. Spoon half of the melted chocolate into each of the compartments. Spoon/press about 1 teaspoon of the desired filling into each compartment. Top each compartment evenly with the remaining chocolate.
Let it stand for 3-4 hours or until set.
Gently twist the ice-cube trays slightly to loosen the chocolates. Remove them from the ice-cube tray. If desired, run a slightly moist pastry brush over the top of each chocolate, and decorate with additional fillings and/or drizzle with melted chocolate of a contrasting color. When stored in an airtight container, these chocolates will keep for a little over a week.

